Thursday, August 23, 2012

Stepping out of the Box.

Expanding your boundaries and stepping out of the box is considered by many as an excellent opportunity to grow and develop.  Such was the case for me recently when I spend four magnificent days on a filming assignment to for Sports Fishing Adventures at Good Hope Cannery located in Rivers Inlet along British Columbia’s rugged west coast.  River’s Inlet is world renowned for its fishing for trophy Chinook or Tyee salmon (a Chinook in excess of 30lbs) due to the long life span of this strain and to its proximity to the mouths of the Kilbella and Wannock Rivers.  These waters offer arguably the best chance of landing a monster Chinnok on the planet.  Good Hope Cannery also offers an excellent fishery for coho and bottom fish such as halibut and lingcod.


My Good Hope is only accessible via floatplane.  Roughly 90 minute s after leaving the floatplane terminal on the south side of Vancouver International I was on the dock at Good Hope Cannery.  We made our way along the boardwalk pier to the main lodge.  Once inside our room assignments were provided and our luggage was waiting in our room for us.  The level of organization and professionalism at Good Hope was immediately evident.  I was looking forward to my stay.

Good Hope Cannery Offers First Class Amenities and Service

After a hearty lunch and orientation it was time to the hit the water for the first time.  Weather was a bit on the ugly side as the tail end of a system was passing through.  Not a problem though as each guest is outfitted with rubber boots, rain paints, inflatable life vest and rain jacket.

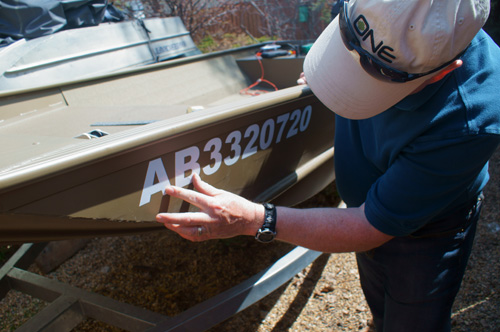
I felt spoiled at the quality of the Good Hope fleet.  Depending on if one chooses a self or premium guided experience you find yourself in either a 20’ or 25’ Yamaha powered boat.  These boats provided wonderful fishing platforms.  I was fortunate to fish out of both boat sizes.  Good Hope boats are outfitted with the latest technology including sounders GPS and radar.  All fishing gear was also provided by the lodge.  Truthfully it felt a bit weird a first as I usually bring enough gear to outfit a small shop.

20 and 25 Foot Boats are a Good Hope Standard

The one thing that didn’t accompany me on this trip was my fly gear, rods, lines, reels and flies were all at home.  On this trip I would be power mooching.  A method I hadn’t used in years. 

Power mooching consists of slow trolling using a long mooching rod, single action reel, small 6-8 ounce weights and cut plug herring for bait.  If you aren’t familiar with cut plugging the head and entrails are removed from a large herring.  The angle of the cut to remove the head is critical to how the bait rolls.  Each guide had their own unique way of preparing their bait. It was fascinating to listen to their rationale.  Prior to disappearing into the depths each cut plug was checked for the proper roll and action.  The prepared bait is rigged onto a series of two or three barbless hooks.  One hook ‘tows’ the bait from the front, a second hook is mounted at the tail and some guides used a short ‘stinger’ hook that flowed with the tail of the bait. 

Mandy, One of Our Excellent Guides Shows How to Prepare Herring.

After spending most of my fishing life in world of single barbless hooks three hooks seemed a lot.  But in short order I saw how easily fish could take a bait and escape unscathed.  Large Rivers Inlet Chinook are maestros at bait removal, capable of stripping bait from a team of hooks in seconds leaving little or no remains of the cut plug.  I saw this first hand on a couple of occasions.  Talking to the dock staff who clean the customers fish they told me it was a common occurrence to find whole cut plug herring amongst the stomach contents.

Power mooching is done a slow troll, roughly 1mph at a shallow depth.  When chasing Chinook we had two stern rods, two rods out each side and one lone rod mounted on the bow.  Each rod was typically set at a different depth measured in pulls.  Our pulls were shallow, ranging from 5 to 10 pulls on average.  A pull is roughly 2-3 feet.

The bow rod fascinated me as it was set shallow, usually five pulls.  The bait was essentially tracking just below the boat’s hull about half way back from the bow.  The guides told me that takes to the bow rod are nothing short of heart stopping. 

When coho are the targeted species the bow rod isn’t used.  Coho hunt in packs and when you run into one the term ‘coho chaos’ becomes a reality.  Two, three even four rods all going off at once on rolling sea is something to behold.  It was something I experienced firsthand.

The sounder display showed large Chinook suspended near the bottom.  It didn’t seem to make sense working our baits so shallow.

Ted Walkus, the lodge manager has been living with Chinook his entire life.  When he is not working at the lodge he is helping manage ad preserve the Chinook salmon of Wannock River that are such an integral part of Ted’s life and legacy.  Ted explained to me the rationale behind the use of the shallow running baits.

The fresh water flowing into rivers inlet is warmer and less dense than the ocean water so it flows on top of the salt water.  The surface water in the inlet is murky, reminding me of glacial till.  The sounder often interpreted the interface between fresh and saltwater as bottom 9-10 feet down the density difference was so great.  Returning Chinook, after spending most of life, up to eight years for some specimens, prowling the open ocean had to adjust to fresh water once again.  Ted told me that their kidneys, after expelling salt for years, now had to adjust once again to retaining salt for their final journey to their birthplace.  As part of this adjustment process the Chinook rose up to take a ‘sniff’ of freshwater.  This practice provided the perfect intersection for our baits rolling below.

Our First Day Was a Wet One.

Our first afternoon was more of an exploratory trip and we tried our luck for a Tyee at a number of locations.  After about four fishing all we had to show for ourselves was one completely cleaned set of hooks.  Despite three of us on the boat no one saw the rod move.  Chinook can be sneaky and fast. 

Although we didn’t latch into a Tyee father and son, Joe and Joey, from the eastern U.S. did.  Joe caught and released a magnificent 64 pound Tyee that took two people to hold.  It was a massive fish, the biggest Chinook I had ever seen.  Joe and his son were proud to release this fish. 

Joe and Head Guide Tyler Release a 64 Pound Tyee

The next day came early, 4:50am to be exact.  After a few welcome cups of coffee and a hardy breakfast we were on the water once again heading to Marker 16 and the Log Dump where numbers of large Chinook were reported to be stacked up.  The rain had stopped and we motored up Rivers Inlet amongst a dense blanket of fog.  Safely at our destination, we got our baits into the water and began meandering around with the other boats that had accumulated there. 

By mid-morning the fog began to lift and provided some great photo opportunities as the sun began to burst through and take hold.  The conga line of boats was now visible. Over 25 boats were weaving politely in and out of each other.  The morning became somewhat of a social event as we chatted with each passing boat.  The etiquette in respect for each other was impressive.

River's Inlet Offers Some Spectacular Scenery

A few fish had been caught but our boat was quiet.  Just after 10am one of our stern rods bounced to life then ceased.  Kevin our guide, was closest to the rod grabbed it and tried feeding at bit of line to entice the curious Chinook back for another nibble at the cherry.  It wasn’t to be.  A quick check of line revealed the bait had once again been vacuumed from the hooks, impressive. 

We re-rigged and had the bait rolling below once again.  The rod had barely been placed back in the rod holder when its left stern partner bent aggressively driving its tip into the water.  No nibbling this time we had a Chinook on.

With the rod in my hands, I began gathering line as fast as I could.  The single action Islander MR2 was identical to my own Islander fly reels.  For the first time I was on more familiar ground, almost.  The one difference, I reel left handed.  This reel was rigged for a right hand retrieve.  Nothing I could do about it. I thought it best not to tell anyone else for the moment.  At first the fish didn’t seem that big but as I gathered line and got tighter to the fish the sensation of weight increased until all of sudden I felt I was attached to a fleeing car.  It was solid, like nothing I had felt before.

The fish didn’t like the tension and began to peel line of at a scary pace.  At the end of each run I gathered as much line as I could only to watch it disappear as the fish sounded once again.  As the fish ran I took the opportunity to switch arms to remove the considerable forearm burn that was building.  I kept tight to the fish at all times and I even managed a little side pressure in once in a while to get as much of the rod into the fight as I could.  After 30 minutes of hard slogging I saw the salmon roll at the surface for the first time.  It looked large.  Now I became nervous.  Most fish are lost right at the boat and I didn’t want to be part of this fact now.  On at least two occasions we had the fish by the boat only to see it sound again.  Thanks to Kevin for his experienced boatman-ship as he was able to move away so I could gain the advantage once again.  Kevin’s boat skills were incredible and played a significant role in the fight.

Finally the fish lay in the net and I saw it for the first time.  It was my first Tyee and it was massive.  After the initial euphoria had passed we had to measure the length and girth of the fish to determine its weight.  Checking the Sturdies Formula based charts each boat carried my fish weighed an estimated 62 pounds!  It was the biggest fish I caught.  I couldn’t wrap my hand around the wrist of the tail. There was no way to lift it. The best I could do was hold across my lap for few pictures.
 
Looking at the Tyee in my lap there was only one option in my mind, let it go.  After all it had endured during its open ocean life and to be so close to its final destination it only seemed right to let it go so it could pass along its superior DNA to its prodigy.

My First Tyee, a 62 Pound Monster

After I few minutes reviving it we watched its powerful tail propel it into the depths.  It was the most incredible feeling.  We hoisted our Tyee flag and because we released it we proudly ran it inverted.
Good Hope Vice President George Cuthbert told me that use a minute a pound as a barometer of how long the fight should take.  According to the T.V. camera’s time codes I managed to subdue my Tyee in just over 35 minutes.  Not bad considering I don’t reel right handed.  I have since been told this might be the largest Chinook ever caught and released on film.  I have no proof of this so we shall see.

Inverted Tyee Flag Flies Proud

Good Hope Cannery actively promotes catch and release of all large Chinook.  At the end of each dinner Tyler, the lodge fish master, provides a daily fishing report, forecast for the following day and recognizes those who caught a Tyee and in particular those that released their catch.  As I caught and released a fish over 50lbs I was awarded with a diamond Tyee pin and a unique challenge coin.  The origins of the challenge coin trace back to World War I when a downed English pilot’s only way of proving his identity to British troops was a unique identifying coin.  At Good Hope Cannery the tradition is if you are asked in to show your challenge coin and you don’t have it on hand you owe your challenger a drink.  If you produce your coin your challenger has to buy you a drink.  Mine coin never left my pants pocket for the rest of my trip.

My Diamond Tyee Pin and Challenge Coin.

Those who chose to harvest a Chinook over 50lbs have the privilege of experiencing another Good Hope tradition, consuming an appetizer made from the heart of their quarry, with or without Tequila shots.  Two Ontario gentlemen experienced this privilege.  By the looks on their faces it only reinforced my decision to release my Tyee.

Every aspect of my Good Hope trip brings back fond memories.  From the boats and facilities, to the quality of the staff, their devotion to detail, their experience and willingness to help and teach, Good Hope Cannery offers a world class experience.  I can’t think of a better place to get out of the box and experience something new and different. 

Please check out my Facebook Page for additional images from my Good Hope trip.

Friday, July 13, 2012

Adapting to the Conditions

As I try to report in each of my blog entries, each trip, seminar or school I provide always produces a lesson of its own.  My recent trip to California was no exception.

For the past three years I have travelled down to Lake Davis for the California Stillwater School I host with Bill Forward Senior Editor of Sierra Fisherman Magazine and local guide.  This past weekend 25 fly fishers joined us. Keen to improve their stillwater fly fishing skills.  Bill and I provide a series of morning and evening seminars over the course of three days.  During the day students put theory into practice as they fish Lake Davis.

Hovering Chironomids Greeted Us at the Boat Ramp

North America has been experiencing high temperatures and they would exact a toll on Lake Davis.  Skies were bright and clear and surface temperatures we up, touching 70F by midday.   These conditions would have a definite impact on fishing and we would have to adapt to be successful.   In years past working the shallows with damsel and Callibaetis nymphs was the way to go.  Early in the day this tactic worked as trout cruised the shallows picking off damsel and Callibaetis nymphs.  Callibaetis spinners were also present.  As we worked the shallow reaches along the west side of the lake delicate lazy rise forms of trout slurping spent spinners greeted each morning. 

I found the rises sporadic and inconsistent and decided that covering the water with a team of flies might be a wiser choice.  Using my Indicator line I rigged up a long 15’ plus leader with a Pheasant Tail Nymph on point, a Herl May on the middle dropper and a Stillwater Cruncher on the top dropper or bob position.  This combination proved effective coupled with a slow handtwist retrieve and 20 second countdown for the 8’-10’ water we were working.  But as the sun and water  temperature rose conditions changed.

Bill demonstrates the correct retrieve posture for the Naked technique

Trout vacated the shallows in search of cooler oxygenated water and to avoid the lethal attention of the local osprey’s and white pelicans.  A few fish remained in the shallows but they were spooky and few and far between.   Conditions dictated going deep.  I was also sensitive to targeting trout in warm water.  As water temperature increases its ability to hold oxygen decreases.  Exhausted trout would have a tough time recovering.  Ethics dictated targeting fish in cooler deeper reaches.

Lake Davis resident with a Collaborator top dead center

As Bill and I moved from one group of students to another checking on their progress we came across a strong chironomid emergence in deep water ranging from 16-18 feet.  Large chironomids, blood midge to the locals, were hatching in healthy quantities.  I was like a kid on Christmas morning as the pupa, shucks and adults of these dipteran presents littered the surface.  After checking on all of our students Bill and I headed back to deep water.  During our conversations with the students we encouraged them to join us.  Many did.

One of our students, John, with a healthy Lake Davis rainbow

Once we were anchored in position I grabbed my Deep Six line and tried ‘dangling’.  After a few casts my gut told me that trout were not concentrated in large numbers and that switching back to a ‘naked’ presentation using my Indicator line and long leader to cover water would be a better presentation choice. I love fishing floating lines and long leaders in water between 14-18 feet.
I swapped my flies, a #10 Summer & Red on point, a #12 Collaborator on the middle droper and swapped the #14 Herl May to the bob. After letting my flies sink for 30 seconds I began the painstaking slow handtwist retrieve common to this method.  About half way through my first cast I felt a short sharp pluck.  A feisty Lake Davis rainbow had latched onto my point fly.  The Summer & Red locked into its upper jaw. The trademark take for this method.  Bill also used a #12 Red Back Pheasant on his setup with equal effect.

Summer & Red

This scenario is common to many lakes as we head into the warm summer months.  Warm temperatures drive trout deep.  If they venture onto the warm shallow shoals it is usually late in the evening through until mid-morning when then head deep once again.  Weedy shoals are often preferred as during the daylight hours plants inject oxygen into the water as part of the photosynthesis process.  Getting on the water as early as possible and waiting until dusk are often the only consistent approaches to shallow water success.  During the heat of the day target water deeper than 15 feet.  A thermometer on a string is a valuable tool enabling you to probe the depths and find a temperature range more to the trout’s liking.

A thermometer on a string helps you probe the temperature at depth

Algae is also a common summer element.  Lake Davis was beginning to bloom.  Most fly fishers don’t see algae as an asset.  But in moderation it is.  Algae provides cover, absorbing the sun’s energy and keeping the deeper reaches cooler.  Algae is sunlight dependent and typically extends 6-10 feet down depending on the concentrations.
 
In shallow productive eutrophic lakes an algae die off in conjunction with high water temperatures strips oxygen and can result in a summer kill.  Trout are the largest oxygen consumers and in oxygen poor conditions pay the ultimate price.

Summer & Red and Red Back Pheasant pupa patterns proved successful

If this warm trend continues it is time to consider leaving trout alone until water temperatures drop.   It isn’t fair to add stress to their lives in these conditions.  Consider targeting other, more temperature tolerant species.  Run off should be subsiding, venturing out to your local rivers and streams is another enjoyable option.

When using the Naked Technique retrieves must be slow.

If you are based in the California area and are interested in attending one of our California Stillwater Schools please let me know.  Space is still available for our October 19-21, 2012 school.

Thursday, July 5, 2012

Dangling in the Parklands

In early June I once again visited the lakes in the Parklands region of S.W. Manitoba. As with previous excursions I was  providing back to back hosted stillwater seminar trips for 26 fly fishers, all keen on improving their stillwater fly fishing skills.   I have been providing these hosted stillwater seminar trips for over four years now.  I venture out each spring and fall.  For some of my students these trips are starting to form part of their annual fly fishing adventures.  Seeing old friends on each trip is a welcome bonus.

Pauline shows why she keeps coming back to the  Parklands.  This local resident was  27" long and had a 17" girth.  That's over 10lbs! (Photo Courtesy of Barry Stokes)

Some of my students have visited these waters on their own but after seeing the success and camaraderie within in our groups chose to participate in my hands on seminar format to grow and develop their stillwater skills.  Fifteen or more anglers all working together provides an excellent learning environment and during our debrief sessions expedites figuring out just what the fish want.  The synergy is similar to a group working efficiently on a large jigsaw puzzle as opposed to one or two people struggling to get it completed.

Bob Vanderwater (left) and I present Bob Morenski (center) with a cheque for $500 
(Photo Courtesy of Bob Vanderwater)

The lakes we target on these trips are public waters chosen for their potential to produce quality rainbows, browns and aggressive tiger trout.  Getting to these lakes just takes time, for me about 10 hours.  The lakes offer easy access and great launch areas, even some camping.  But these lakes didn’t happened by accident.  The Fish and Lake Improvement Program for the Parkland Region (FLIPPR) works with local rural municipalities to make the incredible stillwater fishing the Parklands is becoming famous for a reality.  But like all groups they need our help. For example, the electrical cost to run aerators on the lakes isn’t cheap.  Without winter aeration most of these quality lakes would perish due to winter kill.  Our students, most awestruck with the fishing they were experiencing, were keen to support FLIPPR so they could return in the future.  Bob and Karen Vanderwater, who provide invaluable help in administering and coordinating my trips, and I agreed.  Everyone in both groups donated funds and on behalf of both groups Bob, Karen and I were pleased to present FLIPPR board member Bob Morenski with a cheque for $500 towards their ongoing efforts to maintain these lakes.  If you visit the Parklands region we encourage you to do the same.  It is a small price to pay.

Chironomids were on the menu

As with my spring 2011 trip chironomids were front and center, providing me with the opportunity to introduce students to my absolute favorite way to fly fish lakes.  One group, who were joining me for a second straight year from the Ottawa area, came specifically to learn how to fish chironomids.  Thankfully Mother Nature was in an excellent frame of mind and this trip would allow me to provide instruction using three different chironomid presentation techniques, the naked technique, indicators and full sinking lines or ‘dangling’.  It is rare to be able to provide comprehensive instruction on all three methods as often conditions and trout location dictates only one or two methods, typically those involving floating lines.

I have touched on strike indicator tactics and most recently in my previous blog entry entitled, “Naked in Utah” the naked technique previously.  Dangling is another deadly but not widely used or known technique. 

Big fish like chironomids and lots of them!

Dangling involves a full sinking line from an anchored position.  I prefer type V or VI density compensated lines such as Rio’s Deep series of lines.  You can dangle with slower sinking lines too.  Some of my students did well using clear intermediates. Typically, dangling  works best in water too deep for floating lines, 20 feet or greater but it can work in water as shallow as 12 feet if conditions are right such as windy conditions or water with reduced visibility due to suspended algae.
Leaders are short, 3-6 feet depending upon the number of flies you are using.  The more flies the longer the leader.  I often use a short length of 2x or 3x tippet attached to the fly line loop using a loop to loop or improved clinch knot.

Tiger's love deep water during the day.  They are a perfect candidate for dangling.

The key to dangling is to accurately set the depth so your flies suspend roughly one foot off the bottom.  To do this we used a technique often used to set indicator depth.  Attach a pair of hemostats to the fly and lower it over the side.  Strip off enough line to allow the hemostats to sink to the bottom until the line goes slack.  Reel the line in until you just feel the weight of the hemostats.  Reel in two to three more times ensuring the flies sits just off the bottom.  Strip in the line and remove the hemostats.  You can mark the line with a small section of masking tape so you can find your mark again after you land a fish.  Rio’s new lines feature a built in hang marker set at 13 feet.  I make note of which guide the marker is near and use this to reset my line.

You know you are just above the bottom when you hook a sucker.  Part of my Tokaryk Gand Slam.

With the line distance figured out make a cast.  It looks like you threw the line over the side of the boat, 18-20 feet of line and leader isn’t much.  Avoid the temptation to strip off more line.  If you do all you end up doing is dragging your flies through the mud and debris along the bottom. Let the line sink so it is hanging or dangling directly below the rod tip.  Yes you are fishing directly below your boat, pontoon boat or float tube.  You can let the flies sit below or after a while begin a slow handtwist retrieve with lots of prolonged pauses and bring the flies up through the water column.

Be warned most takes are not subtle.  Hang onto your rod if you aren’t careful it is possible to have the rod ripped from your grip.  A rod with a soft forgiving tip is not a bad idea.  Trout tend to come over the top of the fly and if you are bringing the fly up and the trout is going down the resulting strike is hard and aggressive.  Don’t be fooled by takes as the end of the fly line nears the surface.  Trout often follow the fly up through the water column taking only a few feet below the surface.  Who says fish are afraid of boats?

My standard dangling pose

I encourage you to give dangling a try.  It is a great method to use on windy days and it offers a social element as well as you can carry on a conversation without having to have an eye or both eyes on a floating line or strike indicator.  Short of being unconscious you won’t miss a strike. 

There is still space available for my fall hosted schools, September 13-17, 2012 and September 17-23, 2012.  Please click here for more information.

Wednesday, June 27, 2012

Naked In Utah

For me, blogs seem like feast or famine.  During the off season things seem far less hectic.  Although I am typically speaking at shows and clubs the pace doesn’t seem nearly as crazy as the open water season.  During the off season I am subsequently able to keep up with my goings on and lessons learned.  Now I am just updating you on events that happened just over a month ago.

Falcon's Ledge Greetings Cards Await Every Guest

On the weekend of May 18-20th I was once again in Utah at Falcon’s Ledge for another of my stillwater schools.  The weather was fantastic, a far cry from the typically unsettled spring of western Canada. Due to flight delays I arrived late in the evening.  Luxurious accommodations, a Falcon’s Ledge standard, awaited.  All guests are greeted by a thoughtful welcome card.  This year mine had a slight twist as it also included birthday wishes.  I was thoroughly impressed.  Dave, Spencer, Grant and the rest of the Falcon’s Ledge staff had taken the time to learn my birthday would be on May 19th.  It is easy to see why Falcon’s Ledge is so highly regarded within the Orvis Endorsed Lodge Program and why they are proud recipients of the Orvis Endorsed Fly Fishing Lodge of the Year for 2012.  And yes, birthday cake was provided putting the icing on the cake, pun intended, for my trip.  The diet crashed in flames once again!

Callibaetis Nymphs Were on the Menu

Callibaetis and damsels were active on the lodge lakes.  My Herl May was a trout favorite on every lake that weekend.  Falcon’s Ledge guide and friend, Grant Bench and I were busy every evening replenishing lost flies for everyone.

With each on the water seminar a specific opportunity or presentation technique typically steps to the front.  This time the Callibaetis and damsel activity provided the perfect recipe for the naked technique-floating lines coupled with long, 15 feet or greater leaders.


A Falcon's Ledge Rainbow Taken Using the Naked Technique (Photo Courtesy of Spencer Higa)

Floating lines and strike indicators dominate stillwater fly fishing today. I use them often.  And for good reason as it can be a deadly method.  But there are other presentation techniques such as the naked technique all stillwater fly fishers should learn.  There is more to fly fishing lakes than hanging flies under indicators.

Watching Students Enjoy Their Own Success Adds to my Enjoyment
(Photo Courtesy of Spencer Higa)
Nicknamed for its lack of an indicator, the naked technique is the traditional method I learned to fish chironomid pupa and larva (bloodworm). Strike indicators didn’t exist.  I firmly believe all stillwater fly fishers should learn how to fish flies using a floating line and long leader as it teaches two critical stillwater skills, patience and touch.  Skills, that once developed, improve all aspects of your stillwater presentation.

When fishing the naked technique I use either Rio’s Indicator or Rio Grand lines.  The large head profile of these lines is perfectly suited for casting long leaders.  A Rio Indicator leader forms a critical foundation of my long leaders.  This leader features a short .022” butt section that tapers down to the thin tippet section in less than three feet.  Most tapered leaders feature a butt section that is usually about 50% of the leader for turning over dry flies.  I want a leader system with a stiff butt section to aid turnover and long tippet section to sink flies quickly.
 
For my long leaders I begin with approximately three feet of butt section that is just thicker than the butt section of the Indicator leader.  The butt section is attached to the slender line loop via a clinch knot. I then attach the 10 foot Indicator leader using a blood knot as this provides a smooth horizontal profile that travels through the guides easily.  To complete the over leader length I simply add Flouroflex Plus fluorocarbon tippet using a triple surgeon’s knot.  The leader has to be 25% longer than the water is deep as the leader doesn’t sink straight off the end of the fly line.  So to fish 16 feet down for example,  requires a 19 foot leader.

Using fly lines such as the Rio Grand eases casting long leaders.  Keep your false casts to a minimum, break your wrist slightly to facilitate an open loop and remember the properties of a weight forward line. Shoot the line to the target.  I never false cast more than twice.  Repeated false casts are asking for tangles.  As the line shoots out and reaches the end of the cast let the line shoot tight to the reel or pinch it to a stop.  This causes the flies to slingshot over aiding leader turnover.  Get in the habit of looking for distinct splashes when fishing multiple flies.  If they land within close proximity to each other strip them in and investigate as you probably have the makings of a tangle.  When using multiple flies I keep them 3-5 feet apart depending on water clarity, the clearer the water the greater the separation.  This slingshot technique also works well with indicators.

Spencer Showing Me a Book I should Read!

Once the line hits the water strip out any slack and let the flies sink.  Thirty seconds is standard.  Use your watch to ensure accuracy.  For many waiting 30 seconds is agony.  Remember the patience by product of this method.  Once sunk use two brisk 3-inch strips to remove any slack and perhaps draw a nearby fish to the fly.  If there are no takers begin a slow, and I mean slow, handtwist retrieve.  During the retrieve there must be no surface wake caused by the fly line, more agony for the impatient.

Using Floating Lines Coupled with Long Leaders is my Favorite Method for Fly Fishing Lakes
(Photo Courtesy of Spencer Higa)

Complete line control is critical when using the naked technique.  This means double anchoring when fishing from a boat or pontoon boat.  You must turn your watercraft into essentially dry land.  Any sway means loss of line control and retrieve.  You have to stay tight to the flies to be successful. 
Your fly line is a 90 foot strike indicator.  Watch it like a hawk for signs of a take, particularly the tip region closest to the fly.  If the line veers left right or down raise the rod to set the hook.  If there is a little squiggle in the fly watch it closely.  If it suddenly straightens raise the rod.  In calm conditions you will see takes before you feel them.  The elevated banks of many of the Falcon’s Ledge lakes provided a perfect vantage point when I demonstrated the method.  Students saw the line move as fish inhaled the fly below.  I couldn’t have asked for a better demonstration.  To drive my point home on two occasions during my presentation I hooked and landed two fish twice.

Falcon's Ledge Friends, Spencer Higa (Left) and Grant Bench (Right)

If I were limited to once presentation technique for lakes it would be without a doubt be fishing floating lines and long leaders, particularly if I am working water between 14-18 feet where this method shines. I have provided the Reader’s Digest version of the naked technique and it is often requested at just about everyone of my stillwater seminars.  I encourage you to give the naked technique a try or better yet join me at on one of my stillwater seminars.  I am already working with Dave and Spencer about putting another school at Falcon’s Ledge. Space is still available for my upcoming schools on Fortress Lake and this fall in Manitoba.  Check out my website calendar for all the details.


Wednesday, May 23, 2012

On-Line Stillwater Fly Shop is Now Open

For a number of years now people have always been asking good friend Brian Chan and I about where they can find stillwater specific products.  Well, Brian and I are pleased to announce that our new online Stillwater Fly Shop is now open.

Brian and I invite you to visit Our On Line Stillwater Store for Your Stillwater Fly Fishing Needs

Presently, you can find all of our books, DVD's, Quick Release Indicators, jig hooks for balanced flies along with a complete selection of our favorite Stillwater Solutions patterns.

We will also be adding new products on a regular basis so please check back often.  If you have a specific stillwater product need please let us know.  Chances are others will be interested in it too and we can perhaps add it to our store.

Your feedback is always welcome and appreciated so please enjoy.  You can access the store directly through the 'on-line' store link located along the left margin of my website or proceed directly to the store website.

A direct link to the store will soon be available through Brian's website too.

Monday, May 21, 2012

Messing About in Boats-Part 1

In Kenneth Grahame’s classic book, The Wind in the Willows, Ratty said to Mole, "There is nothing--absolutely nothing - half so much worth doing as simply messing about in boats."  In lieu of my recent activities I am inclined to agree.

Gathering the tools and equipment to mess around with my boat

This past Easter I took delivery of a Yamaha G3 1756 VBW complete with a 40HP four stroke Yamaha motor from John and his fantastic staff at River City Marine.  My latest boat is 17 feet long and 56 inches wide providing a stable presentation platform, not only for myself but for my family, clients and students alike.  The 56-inch width provides added security over my previous 14’ jon boat for those who don’t have the best sense of balance or ‘sea legs’.  I can’t wait to use it to chase stillwater trout, pike, walleye and lake whitefish.

There is nothing as frustrating as inadequate or poorly prepared equipment.  This is true with watercraft and boats in particular.  If your equipment, or lack thereof, dominates your thoughts it limits your ability to focus on fishing and impacts your success. 

With this thought front and center I set about preparing my new boat for the upcoming season. Taking the time and do the job right as I installed decals, anchor cleats, carpeting and pedestal seats.  Outfitting a boat is blend of your personality and the realities of your boat.  So what I do to my boat my not necessarily work for you.  But, I am often asked about how I set my boat up and why.  Here are the details.

License numbers in place

My first step involved the installation of my pleasure craft license numbers.  As my new craft has a motor in excess of 10hp Transport Canada requires a pleasure craft license.  I must clearly display the license numbers on the sides of the boat above the waterline as close to the bow as possible.  The license numbers must be at least 7.5 centimeters (3 inches) high; and of a color that contrasts with the color of the boat.  Since my base color is olive I contacted a local printer and $20 later I was the proud owner of a set of white decals.  As my new boat was clean and new I easily installed the numbers along both sides of the boat.

I used a Scotty Anchor Lock for my rear anchor

Next, I installed my anchor cleats.  In my opinion anchor cleats are a must.  Deploying anchors should be a safe simple operation.  Fumbling around with cleats or tying knots to some part of the boat makes anchoring a challenge and should a fish decide to carry the fight around the anchors you will be hard pressed to raise them out of the way.

Removing the front access cover

I prefer pyramid anchors as they hold well on soft bottoms common to most lakes.  When guiding and instructing I often anchor broadside so 30 pound anchors fore and aft would be needed.  Anything less and I risked having the boat become an annoying distraction if it swayed or shifted in the wind.

Drilling the holes for the bow anchor

For the rear cleat I used one of Scotty’s indestructible anchor locks.  During the destructive testing phase of their development Scotty’s composite locks supported casting molds up to 200 pounds!  My 30 pound pyramid would not be a problem.  The Scotty Anchor Lock is probably the best on the market today.  I use them whenever possible on my boats and pontoon boats. 

Front anchor system in place

For the bow anchor I needed extension out from the boat so when moving from one spot to another the swinging anchor would not batter the boat.  John at River City Marine offers an excellent aluminum anchor system that easily removes for storage or covering the boat for transport.

On my new G3 access to the upper bow area is through a small access cover.  My youngest son, Sean still has long skinny arms.  I was able to con and coerce him to reach through the access hole to attach the stainless steel nuts and lock washers.  He did a wonderful job and didn’t drop one nut or lock washer.  I took over for the final nut and promptly dropped a washer into the bowels of the boat, so much for age and experience.

With the anchors installed I turned my attention to the bow seat.  The comfortable padded bow seat would be mounted on a 15-inch pedestal complete with recessed base.  The base required me to drill a 3.5-inch hole using a bi-metal hole saw through the upper aluminum deck.  Good friend Brian Chan has the same boat so I had a template to work from.  Brian provided me with the measurements from his boat which I transferred to mine.  Prior to drilling I did a test hole on a scrap of plywood to make sure the hole was wide enough to accommodate the recess of the pedestal base.  If it had been too small it would have been nearly impossible to make a 3.5-inch hole larger.  An ounce of prevention is worth a pound of cure!

The moment of truth, drilling the 3.5" hole for the front pedestal seat

I must have measured six times to be certain before committing to the drill.  I held my breath as the pilot drill of the hole saw began to turn and burrow through the deck.  If you have never drilled a large hole hold on tight to the drill.  When a large hole saws first bites into the aluminum deck the drill feels like it is going to be wrenched from your arms. Surviving the initial shock the first hole went perfectly.  I then had to drill a second hole through a support gusset directly below the first hole in the deck plate.  The pedestal base slipped into both holes.  Flush to the deck as advertised.
Prior to bolting the pedestal base in place I cut and fit a piece of black carpet runner to the upper deck.  I recommend carpeting all horizontal surfaces.  Carpet protects the boat from scratches and chips but more importantly it protects fly lines from being ground under feet and provides an element of stealth by muffling noise.  Water is denser medium than air, any clanging and banging about travels through the water alerting any nearby fish of your presence.

Melting the frayed ends of the front carpet

On my previous boats I glued the carpet down.  This time I wanted to be able to remove the carpet for easy cleaning.  Carpet runner has a heavy backing providing weight to ensure the carpet doesn’t blow away when the boat is running at top speed.  I cut a hole in the middle of the carpet section for the pedestal base and then melted the frayed ends using a barbeque lighter.

My son Sean sitting on the installed bow seat

My G3 came with a factory installed vinyl floor which at first glance seems quite fly line friendly.  If the boat hadn’t come with the floor I would have been fashioning a plywood floor and covering it with carpet as I had done for previous boats.  A plywood sub floor prolongs boat life, particularly riveted boats, by distributing weight and avoiding ‘oil canning’ issues.  Oil canning stresses rivets and leads to a never ending parade of leaks that always need attention.  On a traditional V hulled boat floor boards provide a flat comfortable base to stand on, both fore and aft.  Carpeted floorboards are a welcome addition to anyone who has spent any time in the bow area of a traditional V hull boat.

Measure twice, no five times, before drilling.

The last step for the day involved installing the rear pedestal.  As with the bow pedestal it required a 3.5-inch hole.  This time through the vinyl floor and the 1.5 inches of Styrofoam underneath the floor but obviously not though the hull.  All went well.  As I couldn’t bolt the pedestal base through the aluminum floor due to access issues I had to secure it to a 1/4-inch thick section of aluminum plate.  This plate was in turn secured to the floor and into the support gussets that run underneath the floor board.  I used #14 self-tapping stainless steel sheet metal screws.  As with the front seat I was working from a proven template from a friend’s boat.  The rear pedestal base is rock solid.

Phase one complete, now just the sounder and rear carpet left

By days end all was done.  I was sore, tired and a little sunburn in a few spots.  I still have to put the rear carpet, build a cover for the battery and engine compartment and install my new Hummingbird sounder.  Stay tuned for part two detailing these procedures.

By days end all was done.  I was sore, tired and a little sunburn in a few spots.  I still have to put the rear carpet, build a cover for the battery and engine compartment and install my new Hummingbird sounder.  Stay tuned for part two detailing these procedures.

Friday, May 4, 2012

3211Km and a Round Trip Airfare

During a two week portion of April I managed one round trip flight to Boise from my Edmonton area home followed a few days later by a 3211 Km (1995 miles) trip back down to Idaho to attend the East Idaho Tying Expo in Idaho Falls.  If you are wondering why I didn’t stay in Boise and then drive to Idaho Falls you are not alone.  Unfortunately sometimes how things come together isn’t always as neat and tidy as how it should have looked in hind sight.

If you like fly tying then the East Idaho Tying Expo is the place to be

The first part of my tale came together after the plans had been made and airfares purchased for the East Idaho Tying Expo.  Good friend Pete Erickson and I put together our first Fish Fest weekend in Boise.  Our Fish Feast concept broke away from the traditional workshop weekends where one has to typically invest their entire weekend to participate.  In today’s world this investment is not always possible. 

We offered a series of small half day seminars limited to just 10 students.  Pete provided hands on instruction in the art of long line Spanish/French nymphing and short line Polish and Czech nymphing. I provided a similar style program, Conquering Chironomids along with a hands on chironomid fly tying session. 

Pete Erickson at play!

On the Friday evening prior to the weekend’s events we kicked the event off with an informal get together.  Our mutual friend and world traveller Jeff Currier provided his Fly Fishing in the Presence of a Man Eater presentation.  Jeff is an excellent presenter and he had the audience on the edge of their seats as he told of his face to face encounter with a tiger while chasing mahseer in India a number of years ago.  I have heard Jeff’s tale a number of times and I still get a chill down my spine every time I hear it.

Chironomids were hatching, and lots of them!

Feedback was extremely positive from the event and the presentation format we chose. We are already making plans for 2013 including expansion outside of Boise to other states and provinces. 
As with most of my trips I managed to squeeze in some fishing.  Jeff, Pete and I were fortunate to be invited for some fishing on a private lake known for its large rainbows.  Chironomids were hatching, in impressive numbers.  Although we were in float tubes we didn’t have an anchor system.  It was tough to fish our imitations properly and it really limited how we could take advantage of hatch. Pete managed some nice fish using a type V sinking line to get his flies down quickly to compensate for the wind which proved brisk at times. I am a firm believer that you must have complete control of your presentation when chironomid fishing in order to be successful and this means fishing from an anchored position.  I did manage one nice fish using a floating line and a team of chironomids fished from shore.  A quick throat pump confirmed my suspicions, chironomids!  Based on my experience I made a note to myself for future trips to bring a portable anchor system.  I felt like a kid locked out from his favorite candy shop!

Average size rainbow

Within days of returning from Boise I was heading south once again, this time in my truck for the East Idaho Tying Expo.  Long-time friend Brian Chan was joining me. I picked up Brian from the Calgary International Airport on my way south.  Brian had made his flight bookings prior to my Boise trip so I had to return home in order for our plans to work out.  Together we headed south through Montana on I-15 as it snaked along the banks of the Missouri River, crossing the Bighorn and then the Beaverhead near the town of Dhillon.  On the return trip home, Brian and I stopped in Craig Montana on the banks of the Missouri and poked around the three impressive fly shops there.  We made a point of promising to set aside a day to try our luck there next year.  By 9:30pm we were in Idaho Falls.

Brian and I enjoyed ourselves at the Tying Expo.  It was well attended and we bumped into a number of friends including John Rohmer from Arizona Fly Fishing, authors Jim Schollmeyer and Dave Hughes.  Jim and Dave were on their way to the Bighorn and used the tying expo as a stop to catch their breath.  Their trip to the Bighorn would take them 24 hour s from Portland.  It seemed like everyone wanted to cover some distance in April.

While at the expo, Brian and I provided two separate four hour tying seminars where we provided hands on instruction on how to tie some of our favorite lake patterns.  We also provided a couple of on camera tying demos and seminars.  The Snake River Cutthroats club did an excellent job organizing and hosting the event.  Brian and I are hoping to return next year.

Foot in the Henry's Fork, another river off my bucket list.

During our stay we were fortunate to fish one of the waters on my bucket list, the world famous Henry’s Fork.  John Harder, President of Rio Fly Lines was our host. We fished the region upstream from the famed Harriman Ranch section, which was closed, near the small town of Last Chance.  I stood knee deep in the Henry’s Fork within eye shot of Rene Harrop’s Trout Predator and Mike Lawson’s Henry’s Fork Angler.  Two fly shops synonymous with the Henry’s Fork.  Unfortunately the river flow had been increased from 900 cubic feet per second (CFS) a few days earlier to roughly 1200 CFS and the fishing was off.  I hooked, and lost, one good rainbow while managing to land two whitefish.  It didn’t matter to me.  John was a wonderful host pointing out different features and aspects of the region.  I was just happy to be on the water drifting nymphs through the flows of one of the world’s most famous streams.

Looking downstream toward Harriman Ranch

Our trip culminated with a day on Chesterfield reservoir near the town of Pocatello, Idaho.  Chesterfield is one of Idaho’s best stillwaters, known for producing large rainbows.  Upon our arrival we were greeted by a chorus of yellow headed blackbirds, a beautiful sunny day, high clouds and light winds.  Brian and I were there with Simon Gawesworth and Zack Dalton from Rio.  While we were there we focused on some website content for Rio. Brian and I are both on Rio's Advisory Team.  As a result, we didn’t really get focused on fishing until later in the day.  When we did hook a fish a quick throat sample revealed heavy feeding on chironomid pupa.  One fish I pumped had a leech, one damsel fly nymph and at least 75 active, wriggling chironomid pupa.  Brian and I were impressed with what we saw at Chesterfield and hope to return soon.

Brian, Simon and Zack preparing for the day on Chesterfield Reservoir.

Although long and tiring at times, I thoroughly enjoyed my Idaho experience.  I look forward to returning for a stillwater seminar planned for July 13-14.  We will be based out of Island Park Lodge and targeting Henrys’ Lake, possibly Island Park Reservoir and we will have one day’s access to Sheridan Lake.  Sheridan is a private trophy lake.  Last year the damsels were coming off in staggering numbers.  You can check out last year’s blog entry to get an idea.  Seminar size is limited to just 10 people to ensure the best learning environment.  If this seminar is of interest to you please let me know and I can pass along the course info.

Brian at play on Chesterfield Reservoir.

I am now busy getting my new 1756 VBW Yamaha G3 all primed and ready for the new season.  Watch for some future entries dealing with how I customize my new boat for stillwaters.